
What the hell. Let’s talk about Tools.
Gather behind your vision-impaired leader, miscreants!
Author’s Note:: This is a long one. TL;DR? Hopefully someone reads it. Skim forward to the parts you are most interested in, if you want.
I’ve heard from a number of professional artists (via blog posts and comments) that the first thing most students and aspiring concept artists ask them about is Tools. What tablet should I use? Which program? Brushes? Are there any plugins or physical tools that I need in order to do the work that I want to do? WHAT MAGIC OBJECT WILL ENABLE ME TO MAKE TASTY PAINTINGS?!
*Psst* Hey, professionals…Sorry, guys. I’ve been there – until only recently I was the guy asking the question. And I know it got annoying. You can put away the long-suffering look now and get back to painting things that make the rest of us self-conscious.
So I thought – hey. Who better to address this question than another newbie? I’ve just settled on what I feel works for me. So lets address each important tool one by one, shall we? I’ll go over your options and hopefully help clarify what you REALLY need and why.
THE SKETCHBOOK
Very brief summation on this one, because every artist I’ve ever read or talked to has emphasized it. And I’m sure for good reason. Just because you want to get fancy with the digital illustration and painting, DO NOT abandon your sketchbook. Or if you have, pick it back up again. Get some pencils. Draw whenever you have a free moment. I’m doing this. It’s harder than it sounds, but also satisfying.
You don’t need me to tell you which sketchbook you need. Go find a Caslon or something. Or a ream of Office Depot printer paper. Or the back of your arm. Just DO it.
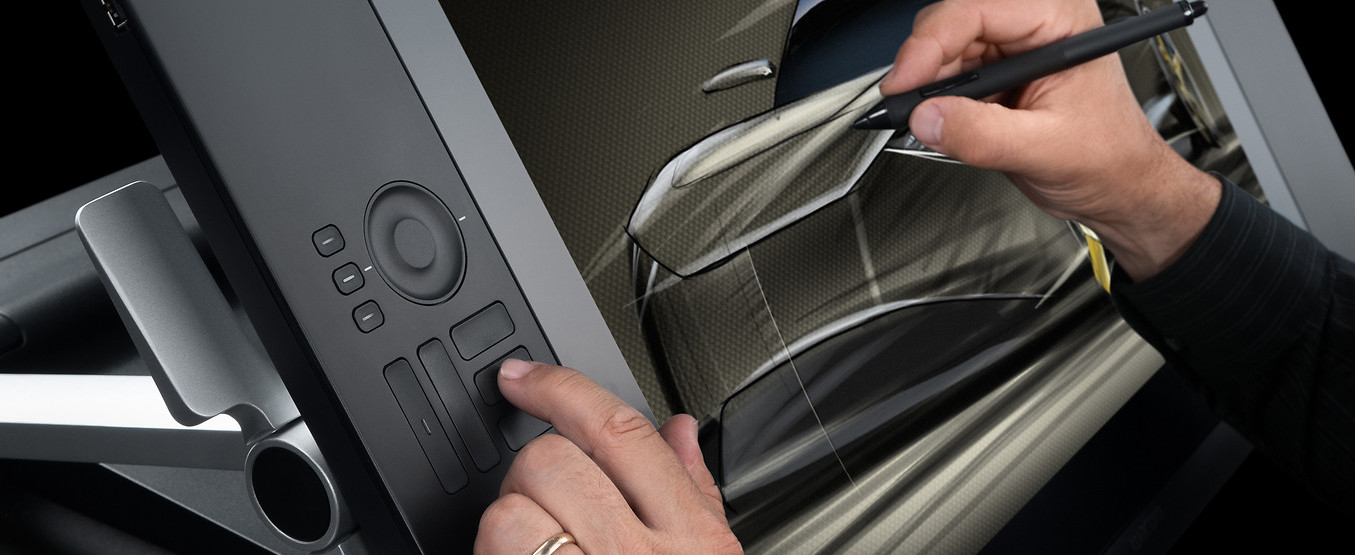
THE DRAWING TABLET
All right, here is the mother of all tools. So many choices! I’m putting this next part in a box because it’s important.
The first thing that I can tell you from my research is that your choice of tablet WILL NOT
I repeat…WILL NOT
be the deciding factor in whether or not you are able to produce stunning work. It just won’t. Once you spend enough time drawing on one, it is nothing more than another pencil (just more versatile).
Did you get that? Because it’s both the most liberating and most depressing thing to learn when starting digital illustration. Oh, you mean the magic tablet won’t automatically make me an amazing artist? Major bummer, man.
But wait…if the tablets that the artists I admire online own (that I don’t own) don’t give them an automatic advantage over me, doesn’t that mean I could be as good as them if I worked hard enough?
YES. IT DOES.
So let’s talk about your options.
There are really two major types of drawing tablets: Cintiqs (and their alternatives), and standard desk tablets (Wacom-brand tablets and their alternatives).
Standard desk tablets have no visual display on them. So when you paint with a standard tablet, you have to look at the screen to see what you are doing. You can’t look at your hand and the pen (which is what most artists are accustomed to doing).
Cintiqs and tablets like them are essentially computer monitors that you can draw onto. They look and feel like you are drawing on paper! Which is great! Obviously you want that one right? Right?
…Oh wait Cintiqs cost a BAZILIJILLION dollars.
But it’s okay! I am here to tell you that you do not need a $2000 Cintiq. They are great, but there are many amazing artists out there who perform at a professional level with no issues on a flat desk tablet.
My recommendation to anyone starting out would be to find a standard desk tablet of decent quality and size, and learn on that. Learn the trade and sell some work. After that, if you still fancy the idea of a Cintiq, you can use some of that money to buy one.
Hypocrite alert! I own a Cintiq…but only because a very generous relative purchased one for me. I still try to use my ordinary tablet on occassion – I think it’s important to be able to work on both. They are also great for travelling.
Let’s look at some of my exact recommendations for desktop tablets:
Wacom Bamboo, Intuos, and Intuos Pro
Wacom Intuos Small
Wacom made the original drawing tablets, and they are still top-dog in terms of quality. They usually lead in features as well. However, there is little difference between them and their competitors when it comes to standard desktop tablets. Their products may offer some convenience options (for instance, wireless connectivity on some of their Intuos products, or the fact that their pens do not need batteries), but for the most part an alternative tablet can perform just as well at a significant cost reduction. For instance:
Monoprice Tablets
Monoprice 8.5x5in Drawing Tablet
Monoprice makes a great little tablet. They are inexpensive, reliable, and sturdy. You get a great size for very little money. They’ve even paid attention to the small stuff – the tablet has a nice texturized surface that makes it feel somewhat like a sharp pen on nice drawing paper.
My only word of caution on these is that some folks have had issues with the drivers. If you have a fairly up-to-date system however (which you should for digital illustration), you should be fine.
General Tips on Desktop Tablets:
It MUST have pressure sensitivity. No android tablets where you draw with your finger. The higher the sensitivity, the better in general…but anything over 1024 levels should be just fine. Most tablets today have 2048, and there isn’t much reason to go any higher than that.
Size can be somewhat important. In general you want a tablet that is large enough for you to move your hand comfortably. I’d recommend something with between 8 and 10 inches of width.
Pens don’t matter all that much, but you can usually shop around for different types of grips if you like that sort of thing.
All right! Let’s talk about the Cintiqs and Cintiq alternatives.
Cintiqs & Alternatives
Cintiqs are pricey, as I’ve already noted. The lowest-end model that Wacom offers is a cool $1000. That said, there are a few viable alternatives out there. Let’s look at the standard Cintiq first. Bear in mind that there are older models you could find at Amazon or secondhand, but we’ll just look at their current stuff.
Cintiq 13HD
Looks great, doesn’t it? The nice thing about the industry standard Cintiq is that it has very high build quality and every detail has been carefully considered. From pixel density and screen coating down to shortcut keys and ergonomics, they are a great product. Just don’t go borrowing money from a loan shark to pay for one. Easy to recommend if you can afford it. Or, you could consider one of these…
Monoprice 19in Interactive Pen Display
I have heard great things about these tablets. $400 for a competitive Cintiq alternative? Yes, please. Take a gander at Youtube for a few unboxing videos or reviews of the product. Again, the only thing anyone seems to have trouble with on the Monoprice tablets is drivers. Most people have them ironed out by now, by the look of things. But just keep in mind that Monoprice is a very different business with different priorities from Wacom. Drivers and service could be an important factor to consider. That said, I was sold on one of these before my Cintiq 22HD walked into my life.
A final word on Pen Tablets
I would like to reiterate that these are important tools, but they are not the most important thing you should be thinking about now. Your WORK is always the most important thing. With that in mind, I see no reason why an aspiring illustrator or a student shouldn’t start small. Get a desktop tablet and start learning the tool that way. These are far from the only options out there, but they are good options.
Okay, enough about tablets. Lets look at software!
DRAWING SOFTWARE
There are quite a few options out there for drawing software, but the choices here shouldn’t be all that difficult. Let’s first look at the elephant in the room…
Photoshop
Photoshop is the de facto industry standard. Why? Because it is goddamned powerful. And it has become more affordable (I guess)! More on that later.
Photoshop offers you a few major advantages over other drawing/painting software. First, its status as the industry standard means that you will be able to more easily work with and get instruction from others. Most of the tutorial videos you will find online will be painted in photoshop, and will use those tools. Second, most of the other software that we will consider was designed in a Photoshop-controlled industry. A lot of software models itself after Photoshop because it just makes sense to do so. This means that learning Photoshop will also give you a good starting point from which you can learn several other programs. Third, did I mention that it is ludicrously powerful? It’s been around forever, and there are so many features that I don’t think any one person knows how to use them all. You can accomplish the exact same visual effect in at least 5 different ways, in most cases.
Really, everyone in this industry should know or be learning photoshop. I don’t know why I even brought it up.
The only major barrier to entry on Photoshop used to be the price. No one wanted to spend $700 on a single program. Which is why it was so frequently pirated. Luckily Adobe has moved to a subscription model which is more affordable. Anyway, go to Adobe.com and get it. Just do it.
Corel Painter
Corel is a great alternative/companion to Photoshop for digital painting. It contains a lot of the same tools (layers, file format support, effects), but where it really shines is brushes. Corel may as well be made of physical paints – the brushes react so convincingly that you would swear you have paint on your hands and face when you finish using it.
My only major beef with Corel is that the interface is a little ugly/confusing. C’est la Vie. It can be a bit pricey too – the full version is $300 at the time of this posting. Worth getting your hands on though, even if just to learn the tool.
Paint Tool SAI
I’ve only briefly noodled with SAI. That said, it is a powerful program and one that comes highly recommended by many artists. Used in a lot of Manga and Comic Book illustrations, SAI is becoming a giant in the industry. Its strength seems to be in a simple, streamlined user interface and process that works quickly and easily. It’s powerful and inexpensive (at about $50 USD after the strange Yen-dollars conversion process). Give it a shot.
A final word on software
Learn Photoshop. But also learn other programs – some of them can more quickly and easily achieve certain visual effects than Photoshop can. But again, these programs won’t make you a master illustrator. Only your eye and your hand can do that.
BRUSHES
Oh boy. Brushes are another touchy topic.
Here’s the deal – I’ll go over brushes in-depth in another article. What you need to know right now is that what Photoshop brush you use ALSO won’t make you a great artist.
I understand brush envy, really I do. You watch a tutorial video online of an artist using a custom brush of his own creation, and it just looks so…delicious. You must have it. The texture, the edges…they are irresistible. The brush. It is BEAUTIFUL.
My advice? Take a look around the web for the bare minimum number of important presets. To start learning, you will probably need:
A soft round (with and without pressure sensitivity, which you can change by checking a box in the brushes palette), a hard round (same), a soft oval (same), and a hard oval (same). Maybe get like 2-3 other brushes that have a more painterly texture (something that looks like oil paint).
That’s it. You’re done. No more brushes for now.
No, I don’t care that this one makes grass. You hear me? I don’t care. Put it down.
Jimminy Christmas, you don’t need brushes that do things no brush in real life can do. Not to start with. Figure out the ones I mentioned above, and come talk to me in 5 years.
All right? Okay. All right? Okay.
OTHER DIGITAL BITS AND BYTES
Once you have the drawing tablet and the software, you are 90% of the way to at least having the equipment you need to draw like a professional. Here are a few other resources I’ve found incredibly useful:
The Reference Library
This is a biggie. There are two reasons you will want to build a reference library:
First, you will see a lot of tutorial videos of artists throwing together images and filters with just a bit of freehand painting to achieve some remarkably finished works in an incredibly short period of time.
As I understand it (being at current an industry outsider), this technique is frequently used to mock-up a piece for a client, or to use as a quick and dirty sizzle image when pitching a product. Putting together images in this way is a completely different skill from freehand digital illustration, but it is very powerful. I am practicing working in this way, and I would recommend any other aspiring artists to learn the basics of it as well.
Second, there is absolutely nothing more valuable to an artist than VISUAL DATA. Using reference images may seem like “cheating” or the “easy way out”, but I believe that thinking this way is detrimental to any artist. Drawing a fantasy illustration, you say? Not drawing anything from real life? There’s nothing to reference, right? RIGHT?!
Totally wrong.
Does your image have a sky? Welcome to the land of needing to know how to paint skyscapes. Guess what can help? Reference pictures. Until you know the visual shorthand for something, you need to use references to train your eye. Even if you are experienced at drawing a certain element, you can learn more, or draw more inspiration from, a reference.
Are you drawing a dragon? Certainly there can’t be reference images of an imaginary monster? Wrong – dragons are just lizards with bat wings attached to their backs, when you get right down to it. Everything that you paint can be broken down into component parts that exist in nature.
Where do I get a reference library?
I would love a professional opinion on this one. I will likely ask a few guys on Twitter for their opinions.
I can’t say I’ve found a good starting place online. There are texture libraries you can find online, and those might be helpful. But as for images of whole objects or landscapes, the only solution I’ve found thus far seems to be to cannibalize the internet.
Spend a few hours every now and again searching the web for photos of things you might need to learn how to draw. Landscapes, architecture, figures, fashionable clothing, faces, plants and trees, etc. Save them to your machine in an organized fashion for later use.
But what about copyright?
It’s an important question. But as long as you aren’t appropriating the entirety of an image without changing it in any significant way, you should be in the clear on fair use. Use these images wisely.
And one more thing – take pains to organize them properly. They won’t be much use to you if you can’t find them. And they won’t be a good time-saver if you spend hours searching for the right image. I would probably recommend using Adobe Bridge, Picasa, or some other photo organizing software.
Plugins
There are quite a few plugins and program extensions floating around out there. Many of them function as shortcuts for functions that Photoshop and other painting programs already have. Some of them add user interface tweaks that make your working life easier.
By and large they are pretty cool but ultimately unnecessary, I think.
I will likely put together another blog post on user interface customization, keyboard shortcuts, and other productivity tips at a later date.
In the meantime, the only plugin I would like to actively recommend at present is Coolorus. They aren’t paying me or anything, I just really like their product. Coolorus is a color picker plugin for photoshop that gives you a very versatile tool for selecting just the right color.
IN CONCLUSION
These are the tools I am currently working with. It took me a few months to really pin down exactly what I wanted and needed to get started and to learn. I hope that this post can act as a shortcut for a few people and help them get started.
If you have any brilliant, life-altering tools that you have found drastically improved your digital painting life, please let me know in the comments! More importantly, did I miss something essential? Tell me. Would you simply like to tell me that I’m not any good and shouldn’t be poisoning our artistic youth with my inexperienced rambling?
…don’t tell me that. Or at least be nice about it.
Go forth and draw.